In the realm of formalized software development, where precision and reliability are paramount, mastering Swagger API testing is indispensable. This blog meticulously dissects Swagger API testing, offering a refined methodology designed to elevate your testing practices. As APIs continue to play an important role in software architecture, Swagger's robust tools and specifications have become synonymous with effective API testing.
Accelerate the Swagger API Testing Process. How Swagger UI is Different from other Frameworks
Define Swagger Open API: Swagger (Open API Initiative, Linux) is a structure for defining your API in a common language. Swagger API Testing solves business requirements while ensuring great developer experience by its definition-focused approach.
What is Swagger? Swagger is a blueprint for application integration that can be understood by developers and tester, even with low coding knowledge. You can apply whatsoever structure resources you want, but you can’t cross the parameters of this blueprint.
- Swagger UI helps business partners, product managers, and prospective clients to contribute to API designing.
- The blueprint (documentation) can be shared with your internal team and can be used for swagger API testing automation.
- It’s simply adaptable for testing and troubleshooting APIs.
- Swagger UI presents APIs in a browser; thus, it is extra intuitive compared to other tools like Postman, SoapUI, and others.
Swagger API Testing Documentation (UI version 2 with ASP.NET Core
Both Swashbuckle and NSwag comprise an implanted Swagger UI version, ensuring that it is hosted in your ASP.NET Core app by a middleware registration call.
This is the illustration of web UI (version 2)-
.png?width=987&height=425&name=swagger-ui%20(1).png)
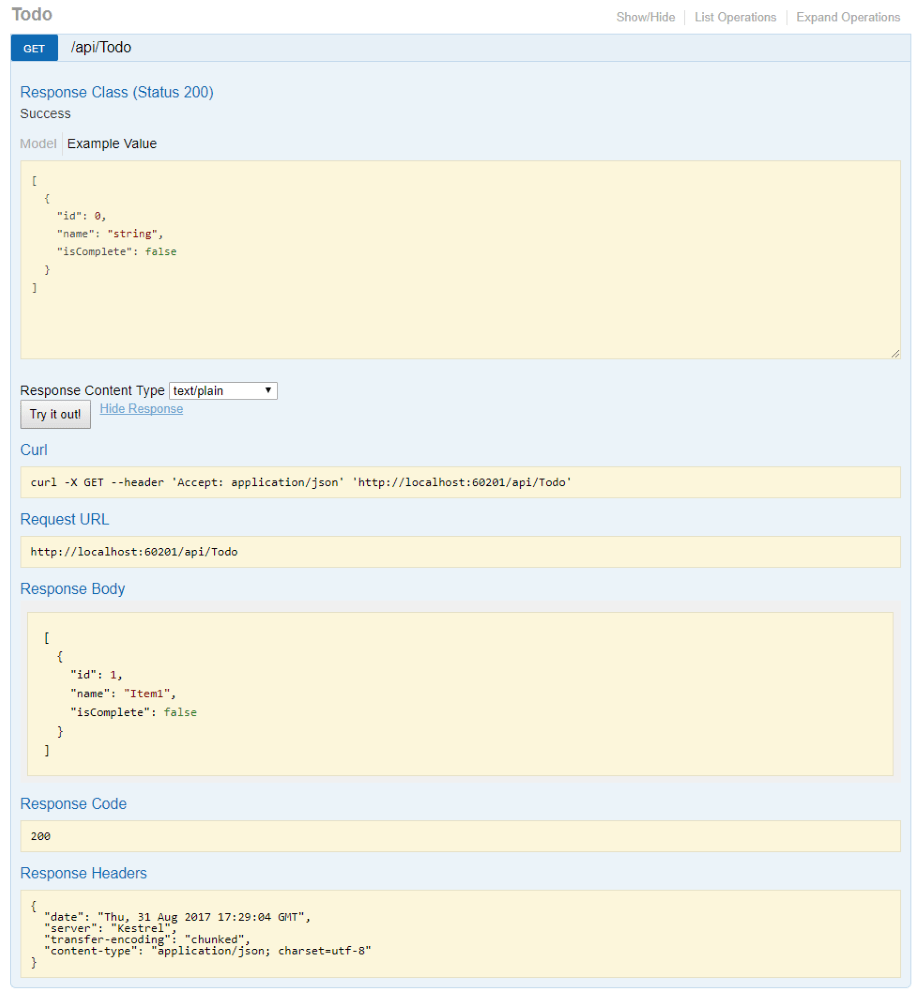
You can test every public action technique in your controllers from the UI. For that, you have to choose a method name to expand the segment. Just insert any essential parameter, and pick.
Next, you can get started with Swashbuckle and Nswag
How does Swagger API Testing Automation Works?
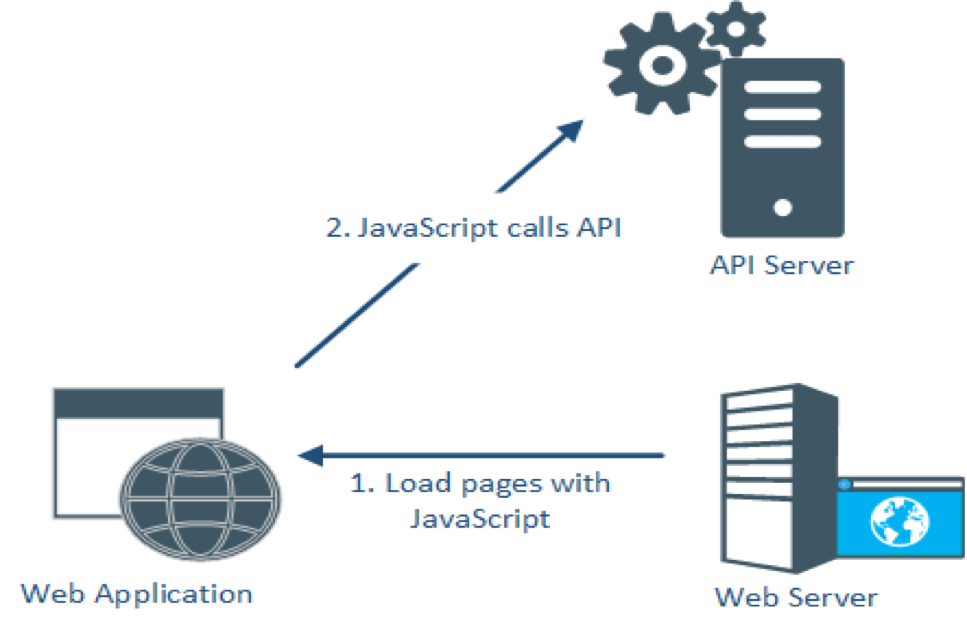
As you open the web page, the browser loads the webpage from the web server and activates requests to the API server for obtaining data from the database. And then SwaggerUI gets automatically generated in the OpenAPI Specification from the defined API. You can view Swagger UI from a browser.
Swagger API Testing Tutorial
Let’s take a glance across a few of Swagger UI’s standard practices.
1. Attach Swagger UI to your API Testing development
For inserting swagger UI, check out if you have included dependency in the pom.xml file.
<dependency>
<groupId>io.springfox</groupId>
<artifactId>springfox-swagger-ui</artifactId>
2.4.0
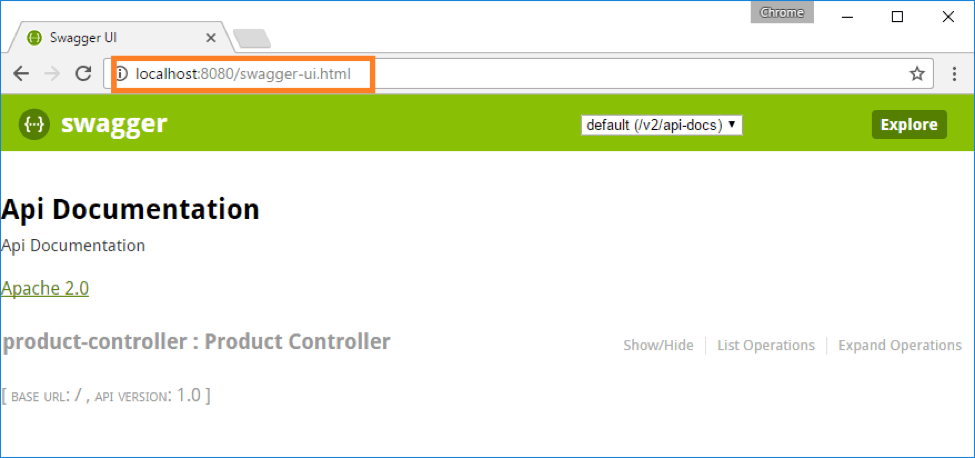
After that, visit the URL by SwaggerUI: http://:/swagger-ui.html
2. Swagger UI for testing your API
For testing your API online, you can use Swagger UI. To get clarity, let’s take an example with the sample - http://petstore.swagger.io/
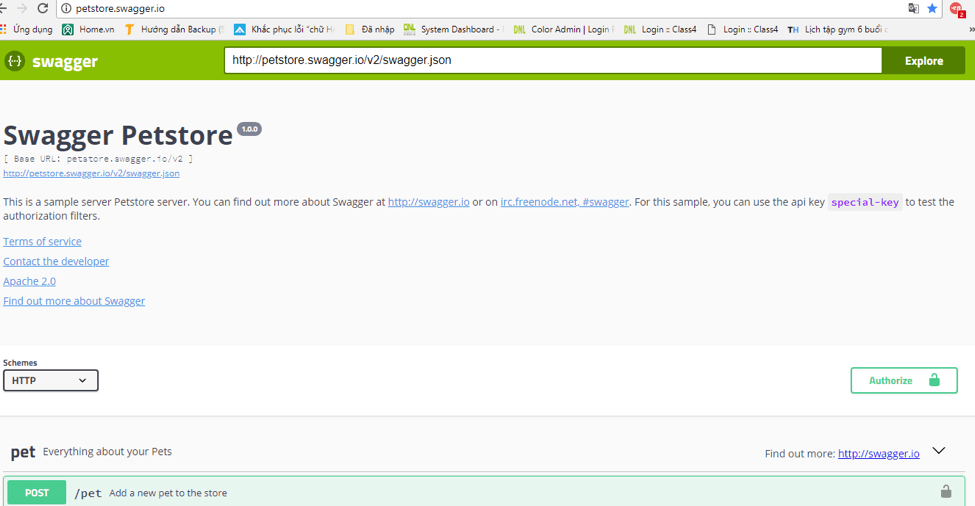
3. Importing a Swagger definition
The first step you require to perform is importing your API platform into Swagger UI.
A Swagger API platform can be in YAML or JSON format. Let’s use JSON in this example.
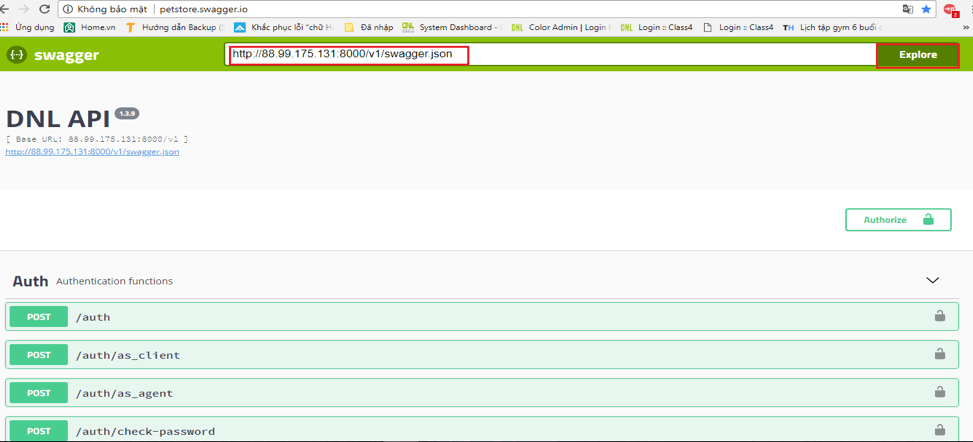
Followed by, insert the Swagger API URL into a blank field and click the Explore button. It will cite all the endpoints down.
.webp?width=975&height=421&name=Phiblog5%20(1).webp)
4. Authentication
While you run the tests for the first time, there is a possibility that it might fail. Because of HTTP request necessities such as query, auth, or headers parameters.
a. You need to Expand /auth, then click the Try it out button and add your account details.
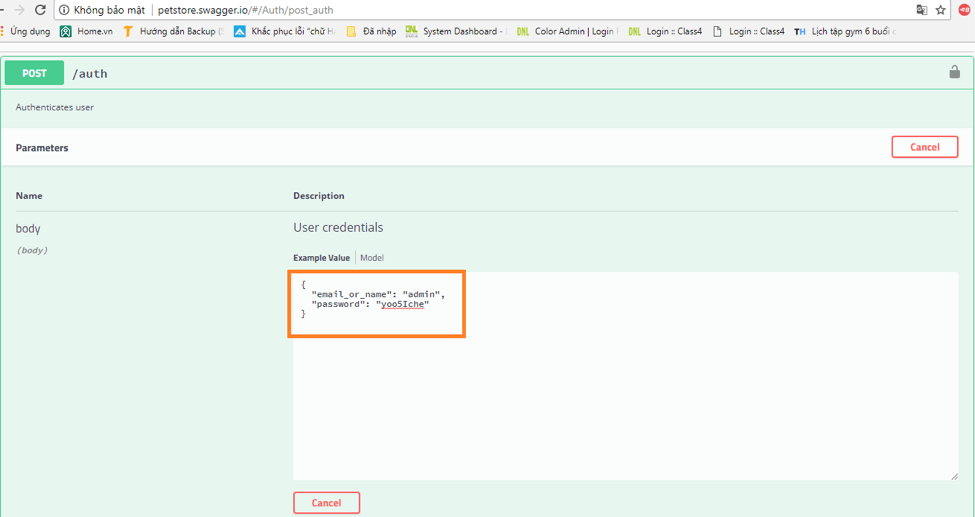
b. Subsequently, push the execute button. It will reply either a failed or passed result. In this instance, it responds with a passed result and a response code 200.
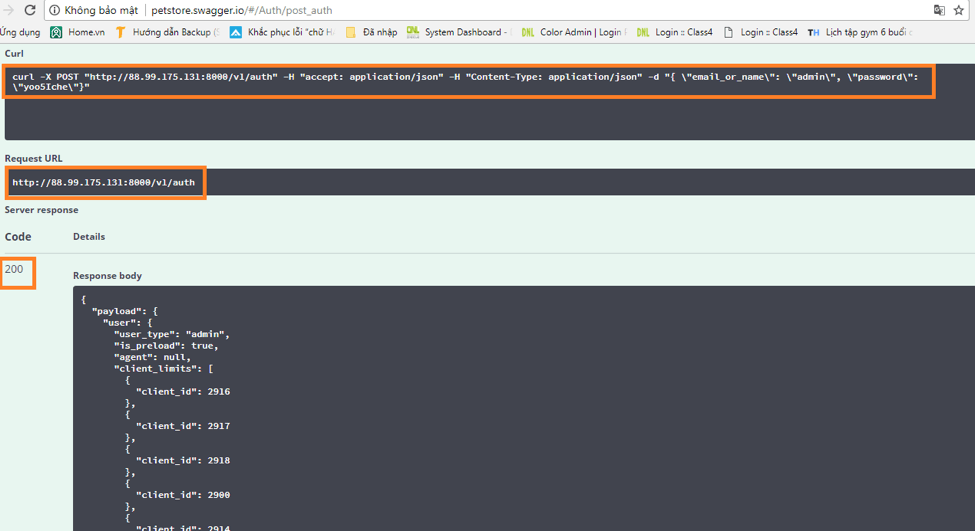
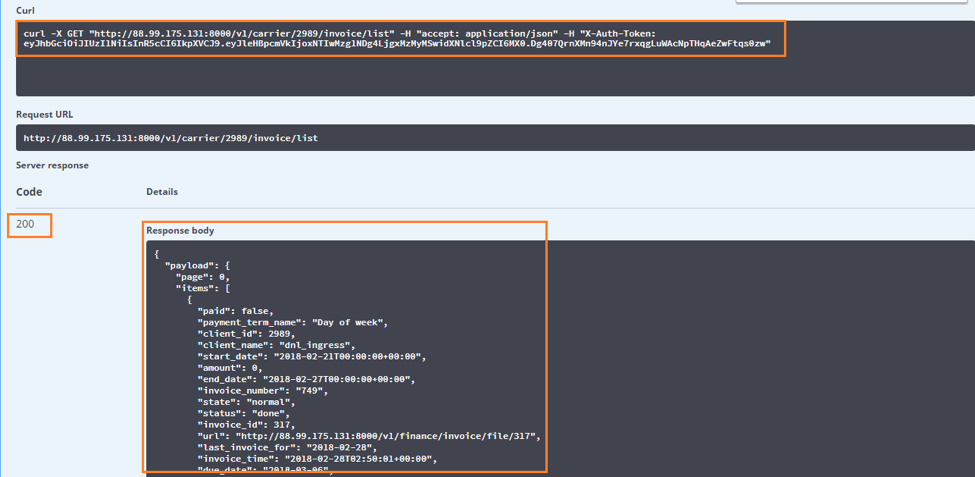
c. In addition to that, you can access more comprehensive information from - request URL, curl command. Get the token string and place Authorize in it.

d. At present, there are 2 ways to authorize- api_auth (OAuth2, implicit) and auth_token (apiKey).
However, for the time being, Swagger UI only supports auth_token (apiKey).
5. Testing the APIs manually
Subsequent to the authorization step, now you are set to test the API. Let’s run an instance:
First of all, generate a GET request
a) Expand GET carrier/{client_id}/invoice/list
b) Click Try it out

c) Add information parameter such as: client_id=2989
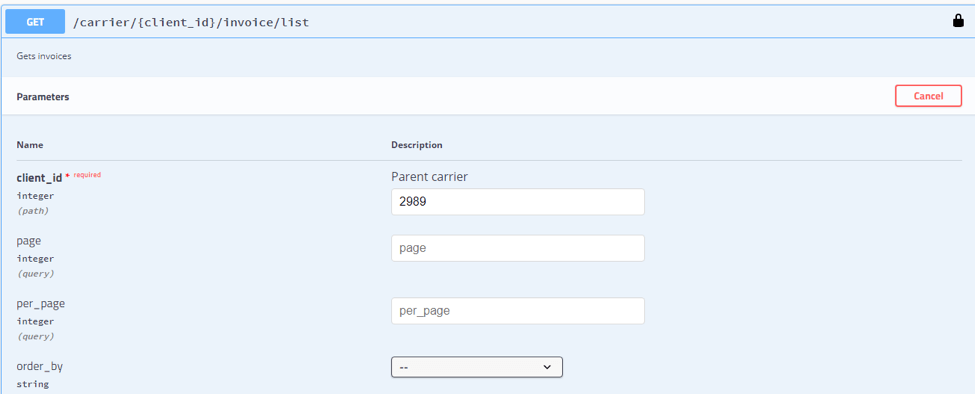
d) Click the Execute button to demonstrate your results.
Knowledge Perspective in Nutshell
I hope now you have got a clear picture of Swagger API testing. Out of the box, if you are interested in understanding how to deploy building-and-testing automation environments using Azure DevOps and & Operations.


